Pages

Showing posts with label DIY. Show all posts

Sunday, July 28, 2013

Dresser Re-done

Earlier this year my mom passed down an old dresser to us. We needed one for the spare bedroom, and she needed the extra space. However, I hated how it looked. I hated how it functioned. So I decided to do something about it to make me love it.
The starting point
First I had to strip off the paint. My mom had coated it in a high-gloss interior paint which, if you know anything about paint, is sticky when dry. I couldn't open the drawers without some wrestling. So that had to go.

I covered the piece of furniture in this...

Let it sit...


And scraped it down.


Then I had to scrub it with mineral spirits and steel wool, and later sand it down. A tip I learned: get extra gloves and ratty shoes for this job. The chemicals will eat right through the plastic.

That done, I repainted each surface. I got the sample paints from Home Depot, a set of colors from one card that coordinated. No gloss this time, so no sticky drawers.


I liked the piecework combination of colors. They're bright and fun, and go with the brightness of the room.

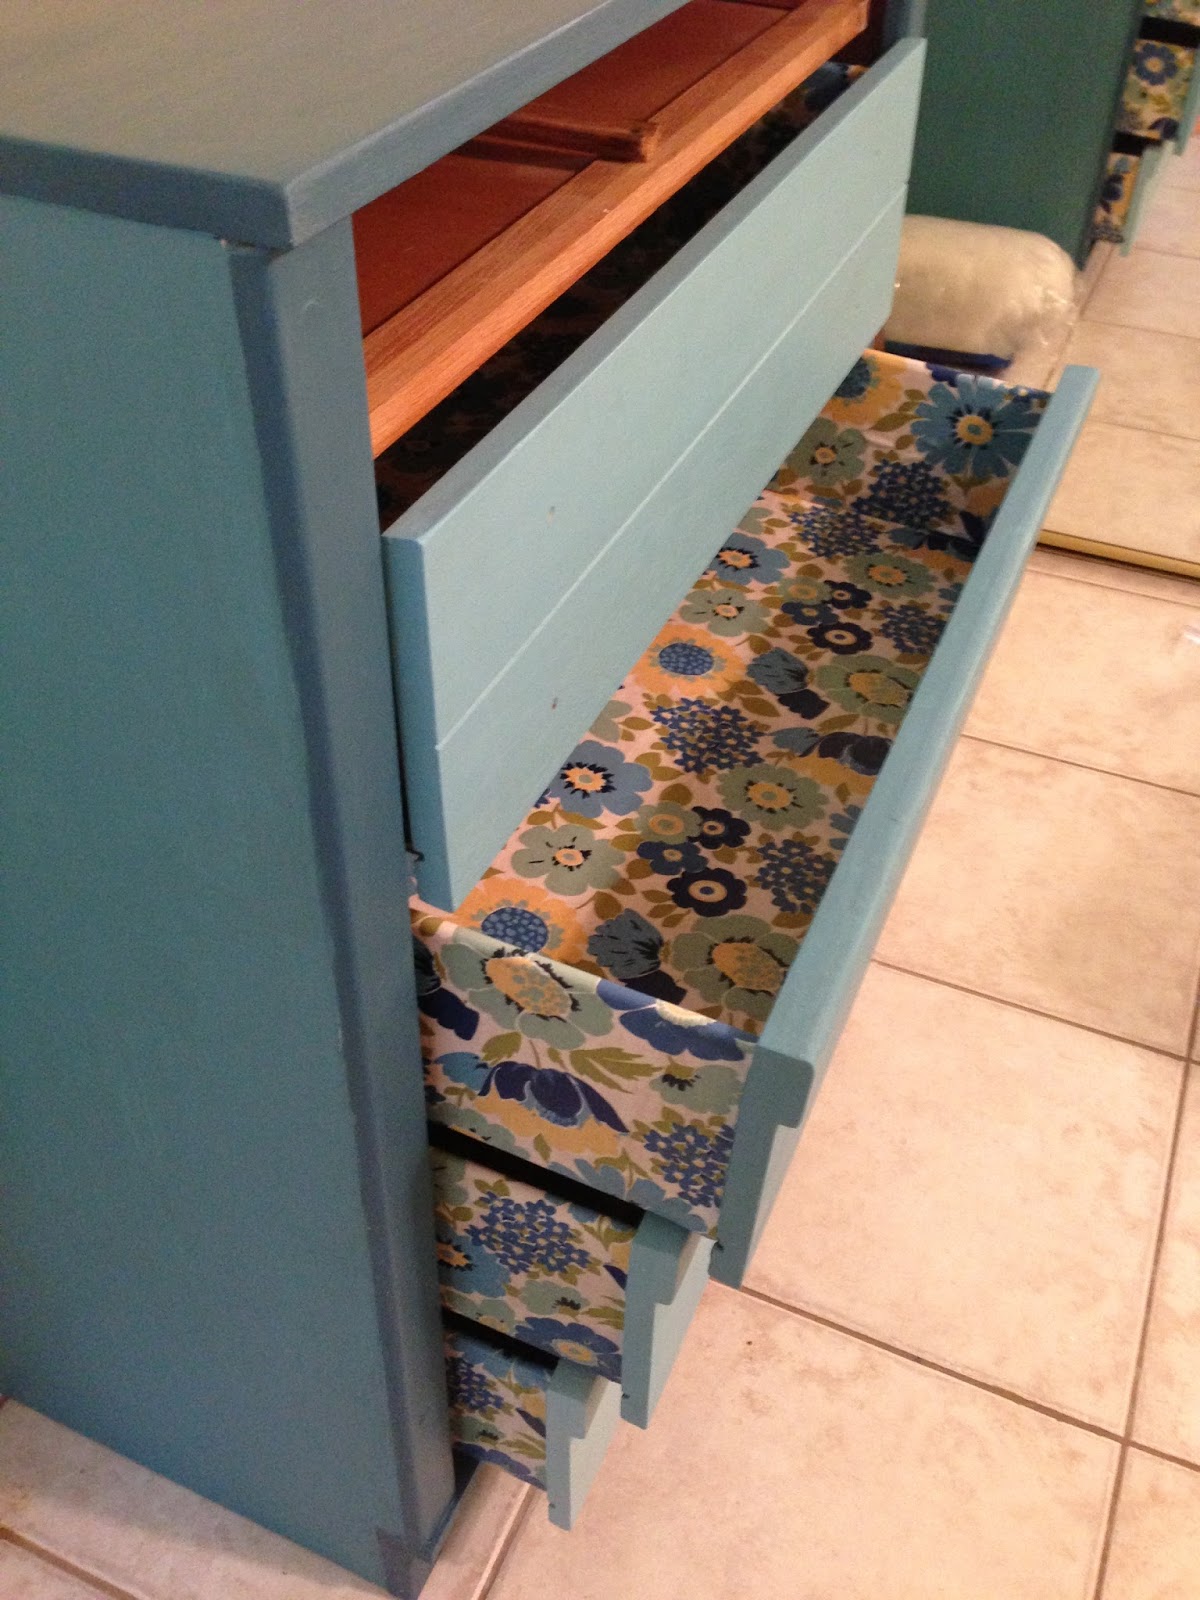
But wait, you say, green and blue and yellow? Isn't that too much? Not if you coordinate it with this fabric lining the drawers!

So after I had coated the paint with Annie Sloan's clear wax seal I got out more brushes and some Modge Podge glue. I coated both the drawer under the fabric and over the fabric itself to form a tight seal and get out all the air pockets. This was a longer process than I thought, to cut the fabric, place it, let it dry, then coat it again and wait for it to dry again.

Three full bottles of Modge Podge later, I still didn't like the finish of the drawers. Also, I felt like the fabric wasn't protected enough against wear and tear. So on to option B. I got some clear furniture sealer and covered the fabric with it. Finally I felt like I could use the drawers without worrying about tears and wear.


Several of the drawers' runners still needed replacing, but all the drawers are workable.

It took a lot of work, but I do love this piece of furniture now. I feel like I turned a blah thing into an accent piece.


Monday, July 1, 2013

Paint Sampling

July should be a busy fun month. I'll be working full time again with three wonderful little boys when their mommy goes back to work from maternity leave. And I've finally decided to paint the guest bathroom.

Ever since we first previewed this house before we bought it I've hated the paint job in the guest bathroom. It's gold and shiny and mottled and just ugly. I've said before that it looked like they took the extra paint from other rooms of the house and threw them all together in there as an afterthought. Not pretty. Not inviting.

Over the last few weeks I've been gathering paint samples to test in there.

Look at that wall color. Blegh.
This is actually my favorite part of the painting process. I absolutely love collecting those little cards and analyzing the nuances of daylight vs. fluorescent, getting ten different shades of light blue-green and deciding which one I want to live with. It's great!

Besides just picking one I like and will coordinate with the rest of the house, I have two other things to match.
This mirror.
These paintings.
The mirror came with the house and coordinated with the ugly gold paint, but I don't want to replace it. The painting were a garage sale find I came across in high school that I'm pretty sure are originals by someone in my hometown church.

I just need to find the balance of coordination without matchy-matchy-ness. Hmm...choices.

As a result of my love affair with paint samples, I have quite a collection of leftover cards. Also a crafter's heart. I have some ideas of things to make out of them, but what would you do? Ideas?

Friday, June 21, 2013

Dresser Preview

I've been in the process for several months of redoing a hand-me-down dresser. It's been a long process of finding the right materials, scraping, rubbing, painting, gluing, sanding, and time.

It's still not done, but it is in the final stages. I've been wanting to share it on here, my process of getting it done. for now here's my little preview.

This dresser has gone from this:
White, sticky glossy drawers. 
To this:
Colorful, pretty, fabric-lined drawers :)
Still working on some finishing (anyone know where to get some center drawer runners?) but I'm feeling really good about this project.


Wednesday, January 16, 2013

You Are My Little Bird

Some good friends of ours just adopted a beautiful baby girl. We are so excited for them!

I remember my friend saying a long time ago how much she like Elizabeth Mitchell's You Are My Little Bird CD, and how she would base her daughter's room decor on the album cover. So I decided to make it her "Welcome" gift. Here's how I did it, if you ever want to make something similar.

I gathered up some 5" by 7" frames and chose the scrapbook paper I was going to use.


I printed out a few copies of the images I would use, and traced them with tracing paper.


The image cuts off, so I hand drew the rest of the child.

I made sure I knew where I was placing my figures before I did anything permanent. 

I traced the 5" by 7" block for each figure to be sure they would fit.

 I made sure that I only traced large color blocks, to save myself trouble cutting out pieces later.


I picked which scrapbook pages I wanted for each color block and overlaid the correct traced image. I cut each individual piece out with an Exacto knife. That's important - don't try to do it with scissors or anything like that. I've found that only an Exacto blade can really get those details.


Here's a while figure cut out, so you can kind of see how the pieces fit. 
Next, I had to cut my matte board to fit the frame. I just traced the placeholder that came with the frame. I cut a piece of pretty scrapbook paper the same way, because I didn't want a plain white background. I used an Exacto knife again to make these deep cuts, since I didn't have a matte cutter.


Finally we get to gluing. You could use a simple glue stick, but I prefer this multi-purpose spray adhesive by 3M. It dries clear, and gives a good permanent hold when dry that I don't think glue sticks will do. Don't even try Elmer's glue unless you want your paper to wrinkle.


Step one: Set up a clean space outside. Put down newspaper or cardboard or some kind of protective barrier, because if the spray gets on anything it is a pain to de-stick it.

Step two: Lay out your first piece upside down. I did my background first, as you will want to if you choose to have one. If you don't have a background, then you can start with any piece.


Step three: Spray it lightly. It won't take much adhesive to make the paper sticky.

These are the legs to one of the little girl figures.
Step four: Pick up the paper with clean hands by the edges and place it on the matte board where you want it. You can probably move it once or twice if you do it right away. Press it down from the middle outward to avoid trapped bubbles.


Keep doing that until all your pieces are stuck down. Be careful about touching and overlapping pieces; you'll want to plan those ahead of time to avoid unsightly gaps between pieces. Wait for them to dry...


Now all you have to do is put them in the frames!


So cute! I hope she likes it!

*I don't in any way own rights to Elizabeth Mitchell's music, or album artwork. I'm not being paid to promote 3M and these are all my own opinions. 

Monday, November 12, 2012

One Month

At our last OB appointment, we were told that it would be in Penny's best interest to deliver by C-section on December 11, if not earlier. I'll be going in weekly to the maternal-fetal care doctor to check the blood flow levels in the umbilical cord, which were low at the last visit. If the blood flow levels get low enough, Penny will be delivered earlier.

One month or less.

So much is still uncertain, unprepared for. I love to plan, and God has taken away nearly everything I can plan for in this situation. Some of that is good: I don't have to worry about getting diapers, clothes, and all of the furniture for her room ready right away. If she makes it through birth, she'll be in the NICU for an indefinite period of time, and all she needs will be provided for by the nurses and specialists.

The bad seems obvious to me: We don't know for sure what the next weeks, months, or even years may look like for us. Will Penny be in them? How healthy can we expect her to be? Should we plan a homecoming shower or a funeral? How much can I really be there with her in the first few days if I'm recovering from surgery? What if?  When? How? Why?

One thing we can do is paint her room. It'll be "Natural Straw Yellow"and "Sea Glass Green" when it's done. I've had the colors picked out for a long time, but now the looming date of December 11 has put us to action. Whether Penny will come home to this room or not I don't know, but one day we will bring an infant to live in there. Maybe there's some metaphor for hope in painting that room. I don't know.
My mom helping us paint. She's already in love with her first grandchild.

One way or the other, within a month our lives will change.

Saturday, October 20, 2012

Homemade Salsa

We started a garden a few months ago. We're so excited about it! This is a project we had wanted to start for about two years now, since we moved into our house. We've been composting and waiting for the right planting season, and now we're getting some fruits from the labor.


Well, veggies from the labor.

I'm not a fan of spicy food. At all. But my husband loves a good salsa so we got two jalapeno plants.  We were both impressed that they have been the most prolific thing in our garden by far. We've seen several dozen jalapenos, each as big or bigger than the ones we get in the store!

For our salsa, we've been using this Pioneer Woman recipe, slightly modified. We use fresh tomatoes and tomatillos instead of canned, and we exclude the lime. With a few other additions to taste, we have a side that is a crowd pleaser!
Boiling jalapenos
Chop chop chop...

Add everything to the food processor

It's easy to make, too. Boil, chop, and throw in the food processor. Anyone can do it!
Yum!