Pages

Showing posts with label home making. Show all posts

Sunday, July 28, 2013

Dresser Re-done

Earlier this year my mom passed down an old dresser to us. We needed one for the spare bedroom, and she needed the extra space. However, I hated how it looked. I hated how it functioned. So I decided to do something about it to make me love it.
The starting point
First I had to strip off the paint. My mom had coated it in a high-gloss interior paint which, if you know anything about paint, is sticky when dry. I couldn't open the drawers without some wrestling. So that had to go.

I covered the piece of furniture in this...

Let it sit...


And scraped it down.


Then I had to scrub it with mineral spirits and steel wool, and later sand it down. A tip I learned: get extra gloves and ratty shoes for this job. The chemicals will eat right through the plastic.

That done, I repainted each surface. I got the sample paints from Home Depot, a set of colors from one card that coordinated. No gloss this time, so no sticky drawers.


I liked the piecework combination of colors. They're bright and fun, and go with the brightness of the room.

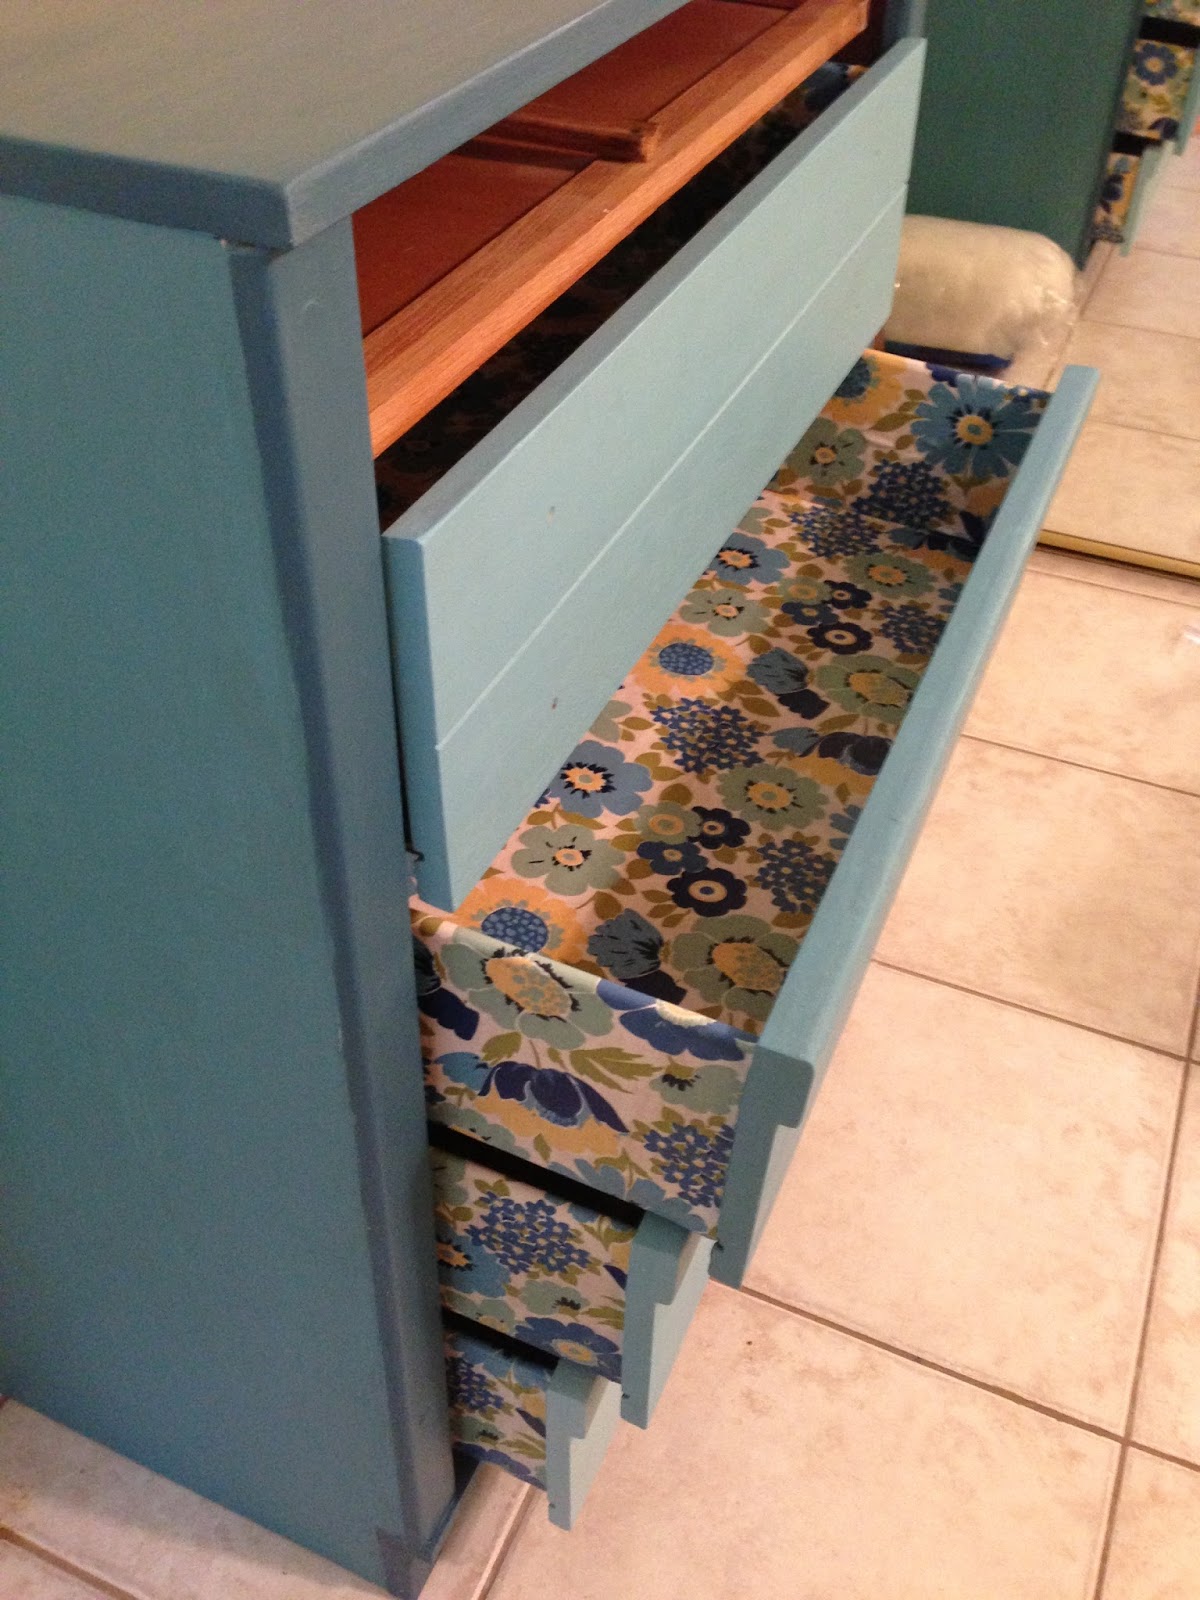
But wait, you say, green and blue and yellow? Isn't that too much? Not if you coordinate it with this fabric lining the drawers!

So after I had coated the paint with Annie Sloan's clear wax seal I got out more brushes and some Modge Podge glue. I coated both the drawer under the fabric and over the fabric itself to form a tight seal and get out all the air pockets. This was a longer process than I thought, to cut the fabric, place it, let it dry, then coat it again and wait for it to dry again.

Three full bottles of Modge Podge later, I still didn't like the finish of the drawers. Also, I felt like the fabric wasn't protected enough against wear and tear. So on to option B. I got some clear furniture sealer and covered the fabric with it. Finally I felt like I could use the drawers without worrying about tears and wear.


Several of the drawers' runners still needed replacing, but all the drawers are workable.

It took a lot of work, but I do love this piece of furniture now. I feel like I turned a blah thing into an accent piece.


Monday, July 1, 2013

Paint Sampling

July should be a busy fun month. I'll be working full time again with three wonderful little boys when their mommy goes back to work from maternity leave. And I've finally decided to paint the guest bathroom.

Ever since we first previewed this house before we bought it I've hated the paint job in the guest bathroom. It's gold and shiny and mottled and just ugly. I've said before that it looked like they took the extra paint from other rooms of the house and threw them all together in there as an afterthought. Not pretty. Not inviting.

Over the last few weeks I've been gathering paint samples to test in there.

Look at that wall color. Blegh.
This is actually my favorite part of the painting process. I absolutely love collecting those little cards and analyzing the nuances of daylight vs. fluorescent, getting ten different shades of light blue-green and deciding which one I want to live with. It's great!

Besides just picking one I like and will coordinate with the rest of the house, I have two other things to match.
This mirror.
These paintings.
The mirror came with the house and coordinated with the ugly gold paint, but I don't want to replace it. The painting were a garage sale find I came across in high school that I'm pretty sure are originals by someone in my hometown church.

I just need to find the balance of coordination without matchy-matchy-ness. Hmm...choices.

As a result of my love affair with paint samples, I have quite a collection of leftover cards. Also a crafter's heart. I have some ideas of things to make out of them, but what would you do? Ideas?

Friday, June 21, 2013

Dresser Preview

I've been in the process for several months of redoing a hand-me-down dresser. It's been a long process of finding the right materials, scraping, rubbing, painting, gluing, sanding, and time.

It's still not done, but it is in the final stages. I've been wanting to share it on here, my process of getting it done. for now here's my little preview.

This dresser has gone from this:
White, sticky glossy drawers. 
To this:
Colorful, pretty, fabric-lined drawers :)
Still working on some finishing (anyone know where to get some center drawer runners?) but I'm feeling really good about this project.


Monday, January 14, 2013

New Backsplash

Is anyone else the type of person who excitedly starts a project one day, and then six months later remembers they started it when they find the unassembled pieces tucked away in a drawer? I sure am. And I'm always equally excited when I find those pieces.

At some point last year I decided to make a backsplash for my kitchen. This week I rediscovered the tiles I bought in bags on a shelf somewhere. I thought, "oh, fun, new project!"

Up until this point, the space behind our sink was simply a painted wall, just waiting for some decoration.

So I gathered my tiles and got to work.
I got lucky at Home Depot to find these white tile sets. I didn't want to have to cut my own tile to make a pattern, but I didn't want to have a simple two-tone checker pattern either. These made it easy. The four pre-cut tiles came as a set, connected with mesh backing. Nifty, isn't it? All I had to do was fit my tiles into the spaces.

Once I had my pattern I measured and marked where the center of the wall (and thus the center of my backspash) should be. Then I slapped on my adhesive and pressed in the tiles.


I made sure the tiles were the way I wanted them and let them cure.

A few days later I added the grout. Here's a learning experience: I found my hands worked much better at applying the wet grout than the rubber float. Too much was falling off the float and into the sink (Oops). So, after cleaning the sink and taping up a newspaper liner to catch spills, I finished smooshing on the grout. The float came in handy for finishing up the details.
Before wiping it clean. After it was dry I sealed the grout.

Another learning experience: read the label on the bottle of caulk. It could save you having to make an extra trip to Home Depot to pick up a caulking gun because you didn't get one when you were there just the other day. Oops again.
I caulked around all the perimeter since I didn't get the tiles with a nice edge.
And it's done! I love having it in the kitchen. It pulls all the colors together, not to mention makes cleaning easier.